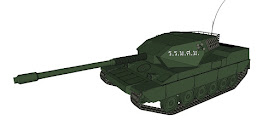
Below is how the tank (uploaded onto SketchUp's 3D Warehouse here) looked after it was done being modeled and had some basic materials applied.

Next, go to Global Switches in Vray, and choose override materials. This will give you what is called a "clay render" as seen below.
You're next going to want to go into "Styles" in SketchUp and change to a "hidden lines" template and under "edit," click on the x-ray option under "face." This will give you a a look at the inside and backfaces of your model, mimicking a technical illustration.
When you bring these two images together, adjusting the contrast and brightness, opacity and gradient, you end up with something like what is seen below. Additionally, you could use the original textures in your model to add some color as well and have it fade from opaque to transparent along with the other layers.
 |
| For full size, see here. |
When you're doing this process it is important to keep your camera fixed in one place while exporting images and rendering. It would be best to add a scene so that you can quickly and precisely return to the same view in case you move the camera in SketchUp. Another issue I had was that the Vray render and image exports weren't the same size. Some scaling was required to make matching overlays in GIMP.


